Tuesday, March 04, 2025

Leafy liverworts from the western edge of Dartmoor.

I've been looking back at some bryophyte samples I collected last summer at a location on the western edge of Dartmoor. The geology was Devonian slates and siltstones and the collections were made in an apparently permanently damp rocky area near a stream. 

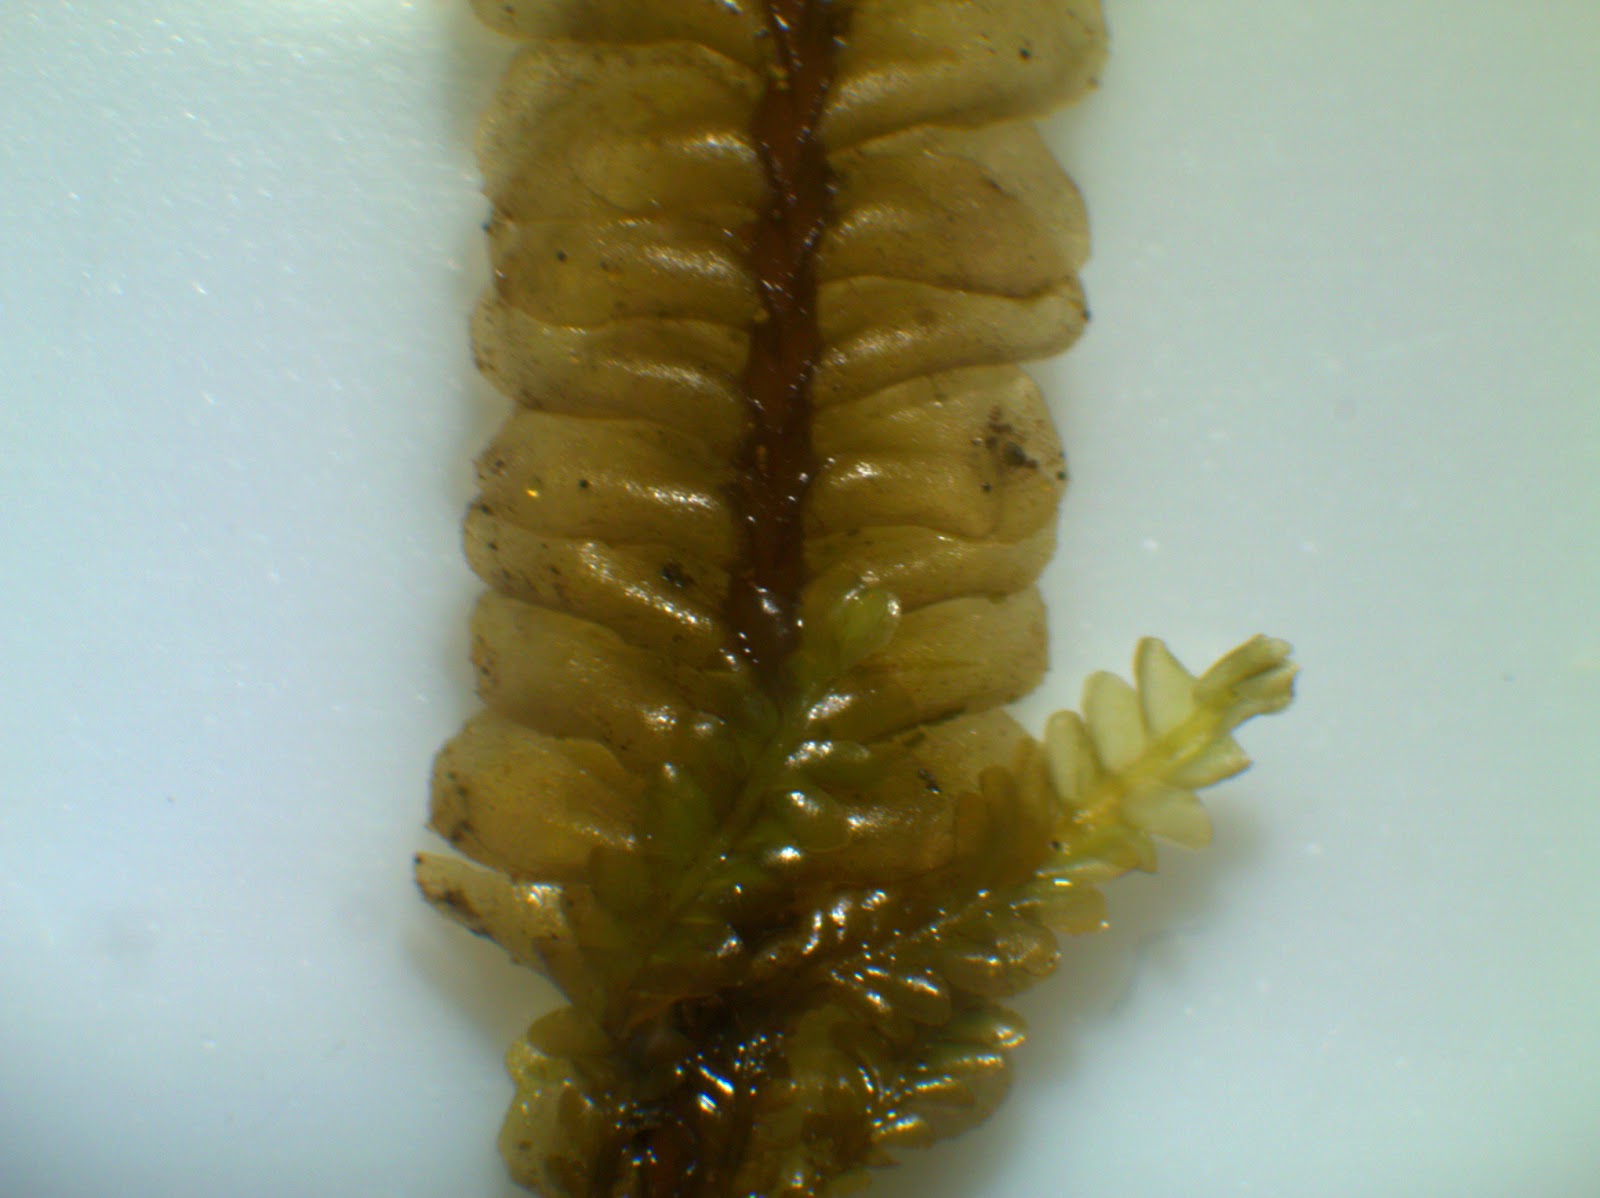
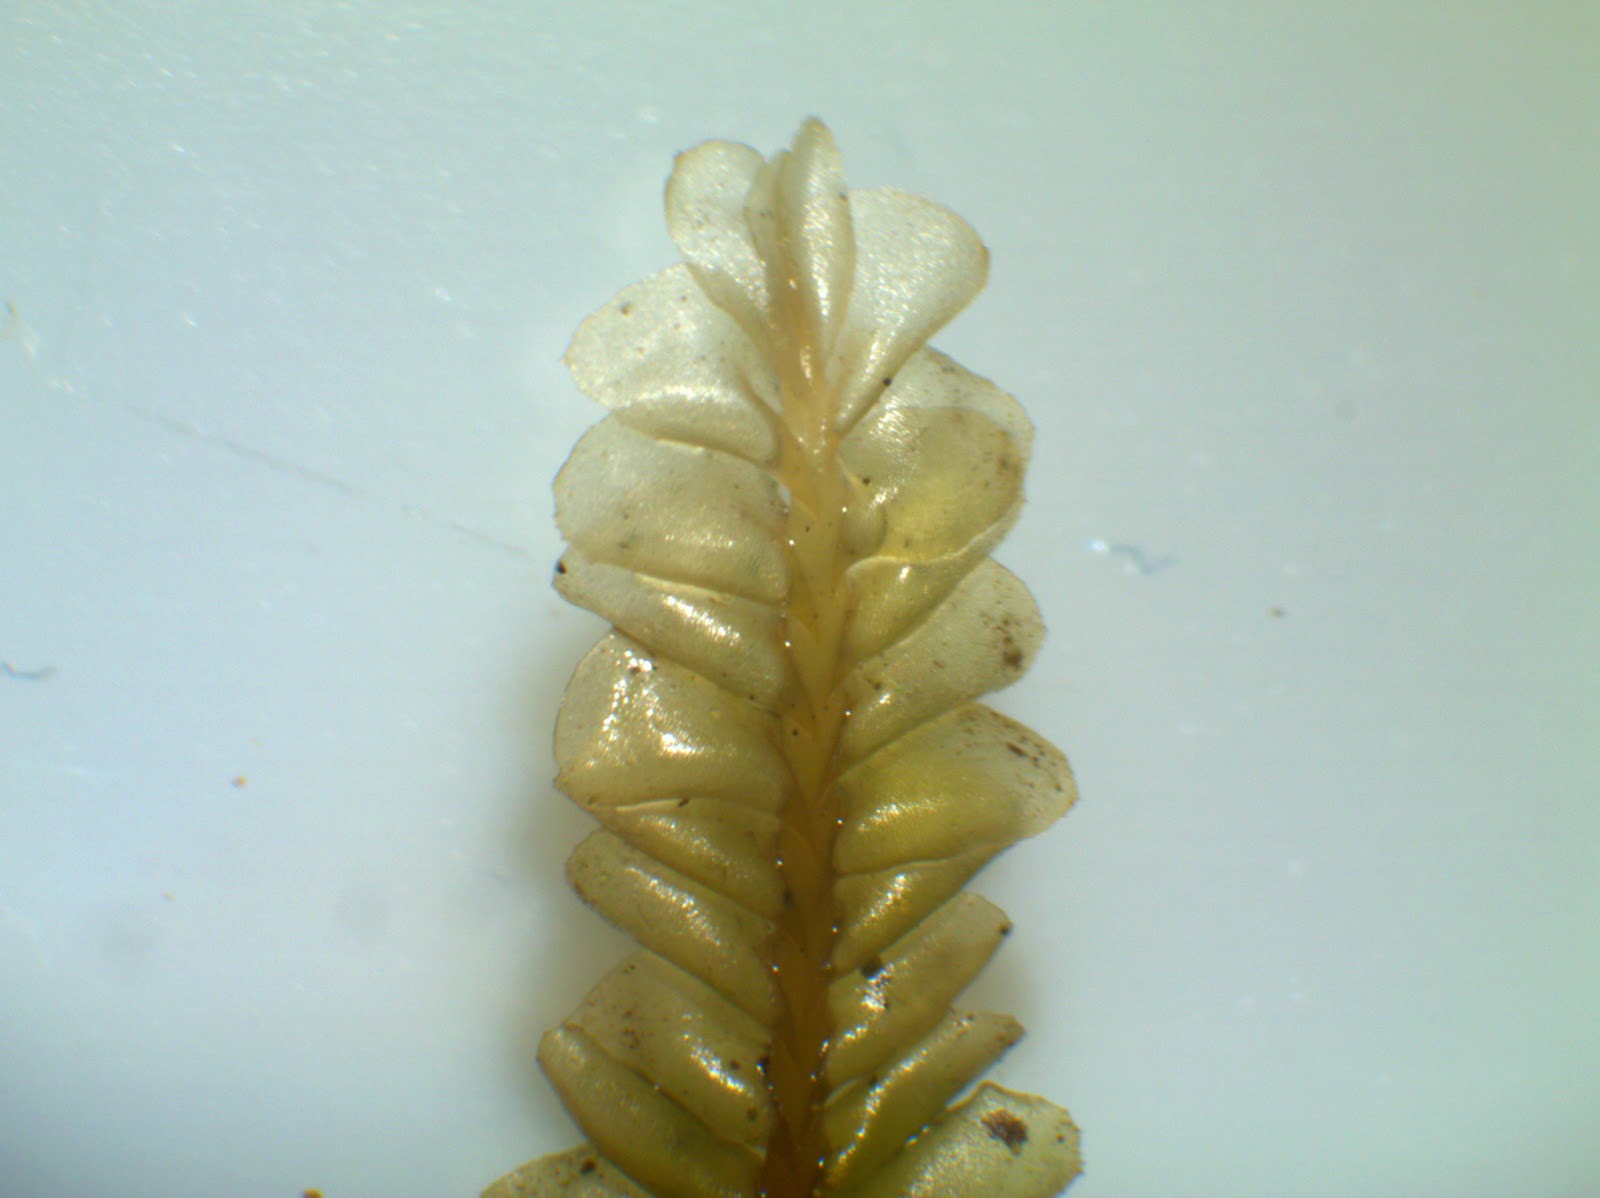
I'm fairly certain this is the leafy liverwort Plagiochila porelloides. Leafy liverworts are not really my thing, and in the past I've found them quite hard work to identify. However, the BBS Field Guide does make things a bit easier. At first I thought I had P. asplenoides, but the presence of thread-like side shoots near the base is characteristic of P. porelloides, and not seen in P. asplenoides.


Shoot tip x10


mid-shoot x10


shoot base, with thread-like branch (x10) [it looks much more like a thread when seen without magnification!]

here's a leaf at x40 and that branch at x40


Here is another leafy liverwort, Jubula hutchinsiae (x20) collected from the same location


I'm rather taken with this one, particularly by the irregularly-toothed leaves. 


Friday, May 31, 2024

Sowing fern spores - part 2

Half term is a time for many jobs, so although I'd hoped to do the actual sowing yesterday I just ran out of time. Today I've painted some garden furniture, been to the bank and also spent the afternoon digging over / building up a bed on the allotment. At last, this evening, I've some time for my ferns again. 

The spores are supplied wrapped in aluminium foil and when the packet is opened it looks like there's hardly anything there! All you see is a little bit of dust. Most of the spores I was sowing were Dryopteris spp. which all have dark spores, but I also had some Ophioglossum vulgatum which were a pale yellow. 


In this photo (pencil and tweezers for scale) you can just see the brown dust of the spores on the foil. The spores are single cells, so very very small. It's a miracle of nature that it works at all; when you think about it, most reproduction seems quite chancy, but it clearly works!

There are several recommended methods for transferring the spores onto the growing medium. I mostly tapped mine out, but I sometimes used a knife blade to lift them and tap them out as the small size of the spores means they easily become stuck to the foil - which might be static,  or might be capillary action/microstructure of the cell surfaces. Tapping out increases the risk of raising spores into the air and cross-contaminating between species, but I was careful to keep the plastic over the spores and to avoid sudden movements that could result in large air currents. I removed and discarded the paper towel and tapped the spores onto the surface of the growing medium. When I used a knife I was careful to clean it with isopropyl alcohol between sowing spores of different species. 


After sowing, I re-sealed the pots in their plastic bags. Labelling is crucial if you want to be sure what you've grown. I had 3D-printed some labels in advance - they were designed in SCAD and I added a pause point to the g-code so that I could swap out white for black when the lettering began to be printed. I might yet get round to uploading the design to Thingiverse if I can be bothered to tidy up my code a bit. 

I then placed all my pots on a north-facing window sill (the heating is now off for the summer, so they should be in no danger of over-heating).  


Over the coming weeks (from a fortnight to several months) I'll be looking for a green film to appear. Over time this should turn into a host of prothalli, the gametophyte generation. Sexual reproduction should then occur between the prothalli and new sporophytes (the stage we recognise as ferns) should begin. At least that's what should happen if it all works ...

I'll post some updates when I spot any changes. 


Wednesday, May 29, 2024

Sowing fern spores - part 1

 It has been a long time since I last grew ferns from spores, so I thought I would try to capture the process here, along with some tips and observations about how it works and some advice for others who would like to give it a try, 

The first step is obviously to obtain some fern spores. You can do this directly from plants when the spores are being released, but one of the many benefits of being a member of the British Pteridological Society is that they operate a spore exchange scheme. So I'm beginning this time armed with some spores I received earlier in the year. Ideally, one would start a little earlier in the year, but being a teacher it's only now that study leave has begun that I've found some time. 

The big difficulty with growing ferns from spores is that they need to be kept permanently warm and wet: that's an environment where many other things thrive, especially mould. To counteract that, the sowing medium needs to be sterilised. 

In my previous attempts to grow ferns from spores, I've done so with compost, but this time I've decided to try out a different growing medium. I started by making a mixture of 1:1:1 coconut coir, vermiculite and perlite. 


The vermiculite I've used here should properly be called exfoliated vermiculite, as it is produced by heating vermiculite clay so that it has changed its structure and expanded. It promotes good root growth and allows the passage of air into the growing medium.

Perlite is also a processed rock substance, in this case a volcanic glass with a relatively high water content, which is heated so that it expands. Non-toxic and large-grained it works in a similar way to perlite.

I prepared my mixture outside as vermiculite and perlite both contain silica and it's best to avoid silica dusts. I aimed to make 3L of mixture and added about 1.5 L of hot water from the tap to enable the coir to expand. I then packed the mixture into twenty 3" pots as I have 10 species to sow and want to do two pots per species. 


I cut circles of kitchen paper to fit on the top. This protects the mixture (to an extent) in the next step and provides a layer that can be removed when sowing ensuring a fresh surface.


I next set about sterilising the growing medium using boiling water. Complete sterilisation and sterile techniques are not needed (it's not bacterial culture on agar) but pouring boiling water through the pots will sterilise the top 1-2 cm, which will be enough to let the ferns get established. I sterilised them in batches of five, monitoring the temperature of the water that passed right through. With a 1.7 L kettle of boiling water, the temperature at the bottom of the pots was 70 deg C. 


As far as possible, it's best to pour slowly so that you don't end up with too much disturbance of the surface. Some indent into the surface is inevitable from the impulse of the falling water, but if enough water is added, the top layer often lifts and floats, re-levelling itself. The pot top left is the best one here, while the one bottom right has been less successful (but will still be ok). 

Already, I'm liking the growing medium better than the compost: when boiling water is passed through compost it can be quite smelly - with strong earthy odours, whereas the smell from this is almost non-existent. Earthy smells (sometimes referred to as petrichor) are caused by two main chemicals - geosmin


and 2-methylisoborneol


However, I digress, as at this point it's important to act quickly before too many mould spores fall out of the air. I used plastic food bags to cover the pots. Scalding is a real risk at this point - watch out for drips! Some people recommend using ceramic rather than plastic pots as plastic doesn't cope well with heat. However, providing reasonably sturdy pots are chosen (these are Stewart premium pots from my local garden centre) then they don't deform in this process. There is a slight plastic aroma and it's likely that the hot water heats the plastic enough for it to lose some of its plasticiser, so it's best to work in a well ventilated space and I wouldn't recommend growing food crops by this method as there is a risk of leaching into the growing medium). 


I then secured the bags with rubber bands below the rims of the pots, cutting off the excess and sealing the remainder of the bag with a kitchen clip. 
 
 
The pots are now ready for sowing, but need to cool completely, so sowing the spores will be a job for tomorrow. I've stood mine in narrow trays as they will need to sit on a north-facing window sill. 


Monday, November 08, 2021

Sphagnum leaf images

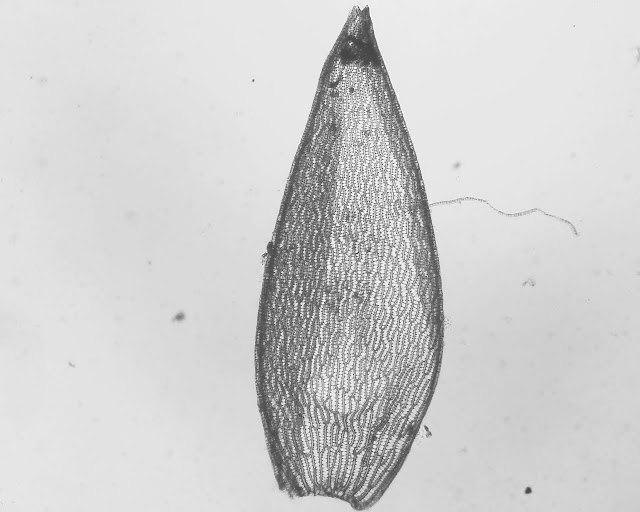
This morning I came across an old packet containing a Sphagnum sp that I had collected a couple of years ago on Dartmoor. Whilst I didn't manage an identification, I was captivated by the cell structure (I think this might be the first time I've looked at a Sphagnum under the microscope for 20 years.  The structure was clear enough in a normal water-drop slide, but use of an old bottle of NBS's Light Green Aqueous really brought out the contrast between the cell walls and the cytoplasm. My microscope camera didn't handle the green tint very well, 

Whole leaf, x40


but monochrome photographs proved to be excellent


Whole leaf, x40

At 100x depth of field became a little bit of an issue, but some great images of the leaf tip and leaf base


And finally the mid-leaf at x400


Sunday, August 22, 2021

Neckera complanata

Today I have been looking at a little fragment of moss I collected in Branscombe, Devon, in early July. It was one of several collected together from a shaded bank along the side of a bridleway, with thin soil and loose flints. 

Here it is at x10 from my dissecting microscope


I keyed it out using Watson's British Mosses and Liverworts but when I looked at the photos in the BBS field guide I remembered I had previously collected this species in Branscombe. On looking at my herbarium packet, I could see similarities, but I was unsure because it lacked the thread-like wispy branches that are seen in the BBS guide photo, although this fragment was a lot smaller.


However, microscopic identification was pretty certain, based on leaf shape and cells sizes. 
Here is a composite of the leaf at 100x, put together in GIMP. 


Clearly, you can see the joins, so I've got some work to do to learn how to adjust the exposures and colours, and annoyingly by the time I was taking these photos a bubble was growing at the side of the leaf 😞. However, I'm pretty pleased with it. Having paid a little bit more to have built-in cameras in my microscopes, I think I should get on and use them to make some reference pictures. I was glad to be able to compare these with some here: https://www.gbif.org/occurrence/gallery?taxon_key=2678588 to confirm the identification.

Now I have another four to identify from that same collection ...

Friday, July 30, 2021

Seaweeds on a groyne on a North Norfolk beach


This is between Cart Gap and Happisburgh  (the pronunciation of Happisburgh is a Norfolk shibboleth ... if you don't know, I'm not going to tell you 😉)

Wednesday, June 30, 2021

DIY microscope case

 Last year, just before the pandemic began in earnest in the UK, I bought a dissecting stereo microscope (it was my birthday present from M). I went for the SX10D from Brunel Microscopes which has an built-in camera and x10, x20 and x40 magnification. I had read that dissecting moss leaves was much easier using a stereomicroscope and now I wonder how I ever coped without it.

One of the attractions of the SX10 was that Brunel were selling a travel case and so when I ordered it I also ordered a case. However, the case was out of stock and between the pandemic slowing imports from China and the general slow-down in shipping in the UK I still don't have the case some 15 months later. I should make it clear that I don't in any way blame Brunel for this - I really recommend them for microscopy supplies in the UK and I bought another microscope from them this year (though that's a whole other story). 

With the summer holidays fast approaching I long to be able to take my 'scope with me so that I can look more promptly at the mosses I collect and (I hope) be able to get back out and practise spotting and naming them. Time to build my own case!

As a first step I looked at making a traditional flight case (plywood with protective metal trims). Whilst this was an attractive project, my workshop facilities are a bit limited, so I decided to go for a Really Useful Box fitted out with foam. When shopping for foam I discovered shadow foam 😀.

I purchased a 19L Really Useful Box from a local supplier and some 5cm deep shadow foam (black and green) from Amazon. The first step was to cut a suitable rectangle from the foam sheet that would fit snuggly in the bottom of the box. The shadow foam can be cut with a sharp utility knife and is very easy to work with. 

The next step was to place the microscope onto the foam and cut around it with the knife. The shape could then be peeled out.

I cut and peeled a second layer at the base and at the top, to get a tighter, deeper fit, leaving the middle section at the first cut height to support the arm and focus knobs. 

This felt pretty snug without any further adjustment and left at least 2cm of foam in place underneath. After checking the fit with the dust cover I then began to cut out other portions around the edge to fit accessories. 

I made space to secure the power cord, the USB cable (links the camera to a PC), as well as the removable base and a petri dish to hold specimens. 


Unfortunately I cut the petri dish space a little close to the edge, and the top surface of the foam split to the edge. However, once fitted into the box, this wasn't a problem.

I was able to fit all equipment into the box and leave a clear 2 cm at the top to allow for deformation of the lid under load. 


For extra stability I used an offcut of the foam (split horizontally) to wedge the base, and there was even room for Watson's flora in the side. I wondered if perhaps I should have left space for Smith's flora, but that would really be overkill for taking on holiday, I think. Anything needing that level of checking can wait until I get home. 


Overall, I'm really pleased with the finished case. I will have to pack dissection tools separately, but the total cost here was just a little less than I had expected to pay for the case and the foam was so easy to work with that I managed to complete the whole thing between putting T to bed and supper being ready. The only "problem" is that I now have two and half large sheets of green and black shadow foam left over. But I'm sure they'll find a use.


Monday, June 28, 2021

Racomitrium lanuginosum


I have been working my way through some old collections of mosses and came to a packet containing a mixture of species from a dry stone wall on Dartmoor. 

I am thrilled with Racomitrium lanuginosum: such a beautiful moss! When dry, there are distinct white hairpoints to the leaves, though these become more or less transparent as the leaves hydrate, but the hair point is coarsely toothed, which is a diagnostic feature for this moss. 

I managed to produce this composite image of one of its large leaves at x40


And then some details at higher magnifications

 And then some details at higher magnifications. 

Here is the toothed margin of the leaf tip at x100


I still have some way to go in getting to grips with the build-in cameras on my microscopes - but I am pleased at the least to capture something of what I see. In the same session I also managed to get this x400 image of Dicranum scoparium. I particularly like the way this image captures the granular nature of the cell contents, the vacuoles and the plasmodemata.


Tuesday, March 30, 2021

Potatoes

Our first potatoes are in - Maris Peer. Another second early and a main crop to follow when I've got two more beds ready ... time for some more digging!

Monday, March 29, 2021

Escape

So finally the "stay at home" order is lifted and we have been able to escape the town at last! T and I didn't go far, only about 10 miles to Wisley Common, which was quite quiet (in contrast to RHS Wisley across the road, where a very large number of car windscreens were glittering in the sunshine).

The only sad thing was that a lot of other people have suddenly started driving on the roads again. I think that possibly some have not been driving at all for the last three months, and have forgotten key parts of the rules, like not driving in the middle lane when the inside lane is clear 😡. 

Thursday, December 31, 2020

2020 Reading

My target was 65 books for 2020 and I managed 62, which given the intense periods of work I had in remote teaching mode during the first UK lockdown is better than I had anticipated.

Here's a photo of most of them collected together.


Most enjoyed (fiction) Terry Pratchett Lords and Ladies. For too long I was put off by the covers of the Terry Pratchett books (I know, don't judge a book ...) but having been introduced to them by M I am really pleased with them. 

Most enjoyed (non-fiction): Anthony Trewavas Plant Behaviour and Intelligence. This is an eye-opening evaluation of what it means to be intelligent and just how much intelligence is shown by plants. My only disappointment was that it was focused on angiosperms, but I really enjoyed learning about many different ideas in plant sciences. 

Best re-read(s): John Buchan The 39 Steps, Greenmantle, Mr Standfast, The Three Hostages, The Island of Sheep. Buchan's "shockers" as he called them are all fast-paced, well-plotted and the scenery is evocatively described, whether that be grimy London, Scottish deer forest, Norwegian Fjord or WW1 trenches . It is without doubt literature from the age of British Imperialism, and many would consider some of the language and themes unacceptable today, but it is literature of its time and to delete it would be to lose something of the richness of the development of the English suspense novel. 

Hardest going: JRR Tolkein - The Silmarillion. I was really proud of myself for making it all the way through and (mainly) keeping track of who everyone was. I read this in the summer, mainly at afternoon tea, sitting in my garden in the shade of next-door's apple tree and I think I will always associate this with the novel. Next up The Hobbit but T is not quite old enough yet. I think the thing that makes The Silmarillion hard-going compared to the other books is that the narrative is all at long-distance. It tells of great and terrible deeds, but the dialogue is limited and you never really "know" the characters. 

Least enjoyed: Robert Harris The Second Sleep. I just didn't "click" with this novel. There seemed to be too many unanswered questions and it felt quite bleak. I am usually a massive fan of his work, so I was surprised. 


I am going to stick with the 65 target for 2021, hoping for a 

Tuesday, December 22, 2020

Finally ... our Christmas tree is decorated.

We bought our Christmas tree a week ago, but it's been under a dust sheet while we've have some minor building work done. Finally, it's decorated 😀

It's beginning to look a lot like Christmas, even in Tier 4.


Sunday, December 20, 2020

Here we go again ...

London is back in lockdown. I can cope without shops, pubs and cinemas. I can cope without socialising, dining out or holding dinner parties. But what I really hate is being shut up in the city, barred from driving 10-12 miles to get into the Surrey countryside and breathe clean air. I'm also longing to see the sea again and really missing the North Norfolk coast and the beaches of Branscombe and Sidmouth. Perhaps, eventually in 2021 we will be able to go again.  

On Monday, before we went into Tier 3 (a week is a long time in the coronavirus pandemic) , I took my son to RHS Wisley and we roamed around enjoying the fresh air and the drizzle and the breeze. I don't mean that ironically - I stood on top of the sprial-pathed mound on the south side of the site and really enjoyed feeling the wind and rain on my face. Being close to the M25/A3 junction it's not really a peaceful spot, but it felt a whole lot less closed in than being in semi-detatched suburbia. Who knows when we'll be aloud back there or onto the North Downs again?

However, on a brighter note, I've bought M one of these for her birthday:


and it's a BIG hit, making really good hot chocolate. It's quick (2.5 mins) and above all easy to clean. The organic chemist in me is also pleased by the fact that it's basically a magnetic stirrer hotplate under the hood. 


Friday, December 18, 2020

One of my favourite Christmas-time pieces of music - Leroy Anderson's Sleigh Ride - played by Cameron Carpenter with considerable flair and style on a theatre-style organ in a New York church. Look out for impressive pedal work in playing the main theme. Organ purists are not always impressed by Carpenter's technique, but there is no doubt that this is a very effective rendition of this piece.


Monday, July 08, 2019

Summer holidays

So what do teachers do on the first proper day of the summer holidays? They spring (err, summer) clean their houses from top to bottom.

Very satisfying. 😊

Now I can enjoy my holiday! 😴

Sunday, June 30, 2019

Sweet peas

We started some sweet pea seeds indoors and planted them out to the allotment in late April. Despite fleece to protect them from the cold nights, they still never really seemed to get going. At times I was ready to give up as the spindly stems seemed to be dying back. However, side shoots appeared and they have become the bushiest and most extensive sweet pea plants I have ever seen! They are now in flower and producing a bunch like this every two days!


Saturday, June 22, 2019

More from the allotment

After two weekends of T's birthday parties and two weeks of almost non-stop rain, today it was finally dry enough to go over to the allotment and see how things were progressing. 


All in all, they were progressing rather well. Our new potatoes (charlottes) are in flower and we lifted the first two of sixteen. T was thrilled to be picking them out of the soil. Despite picking all the sugarsnap peas that were ready last Monday (in the rain), he picked a further half kilo, as well as many strawberries, a few raspberries and (finally) some sweet peas (which at one point this year I was giving up as a total failure). My pinks are a bit of a disppointment - the label on the plants said "to 45 cm" but they stubbornly refuse to gain any height or extend their stem length. They making a pleasing mini-bunch, though.

Of course, the weeds have also been doing well, so despite a couple of hours spent weeding today, I think I'll be heading back tomorrow if the weather holds. 

I'm also working my way through James Hanson's "Chemistry in the Kitchen Garden" which is also prompting me to look back at Bowsher, Steer and Tobin's "Plant Biochemistry". I think improving my knowledge of plant metabolism might be a project for the summer holidays.

Monday, June 10, 2019

Strawberry aroma

A little bit of searching suggests that strawberry aroma is quite complicated. The methyl and ethyl esters of butanoic and hexanoic acids are certainly heavily involved, but 4-hydroxy-2,5-dimethyl-3(2H)-furanone (HDMF) and the 4-methoxy variant are considered to be the key components.

Here is HDMF (again produced using Avogadro and ScreenToGif - it's going to be a long time before I get bored of playing with this!


Whilst I've been looking into this, M has been busy turning the left-overs from yesterday into sorbet. I'm hoping the torrential rain from today (which closed part of Kingston) will eventually stop and we'll get summer back to enjoy eating sorbet!

Sunday, June 09, 2019

Today was T's fifth birthday family party so he and I headed off to Garsons Farm PYO to pick strawberries. Some of the ones we picked are shown opposite!

They had them in an enormous polytunnel and the aroma of fresh strawberries was striking as we walked in. I'm now wondering what compound or compounds are responsible for that aroma!

Saturday, June 08, 2019

Open source GIF creation for molecules

I've recently discovered Avogadro (avogadro.cc), which sells itself as
... an advanced molecule editor and visualizer designed for cross-platform use in computational chemistry, molecular modeling, bioinformatics, materials science, and related areas. It offers flexible high quality rendering and a powerful plugin architecture.
Combining its DNA builder, with "Screen to Gif" (www.screentogif.com) I have been able to create this very quickly.


Which is a very pleasing animation and obviously useful for visualising molecules in lessons.